
#Introducing Swiper Studio's Seamless Integration with Webflow
We're thrilled to announce that Swiper Studio has officially integrated with Webflow with our new unified PaneFlow & Swiper Studio app, empowering designers and developers to create stunning, interactive sliders with ease.
This integration combines Swiper Studio's powerful no-code slider builder with Webflow's industry-leading visual development platform, unlocking new possibilities for creating dynamic, responsive, and visually captivating websites - all without writing a single line of code.
#Why Swiper Studio and Webflow Are a Perfect Match
Swiper Studio is renowned for its intuitive interface, extensive customization options, and ability to craft sliders with advanced effects like 3D transitions, parallax, and more. Webflow, on the other hand, is the go-to platform for building professional, responsive websites visually. By bringing these two tools together, we're making it easier than ever to elevate your Webflow projects with sliders that engage and impress your audience.
This integration leverages Swiper Studio's Publish to CDN feature, allowing you to seamlessly embed fully customizable sliders into your Webflow sites. Whether you're showcasing a portfolio, highlighting products, or creating an immersive hero section, this integration streamlines the process while maintaining the flexibility and control Webflow users love.
#How to Use the Swiper Studio App for Webflow: Step-by-Step Guide
Getting started with the PaneFlow & Swiper Studio app for Webflow is easy. Follow these steps to connect your Webflow account, embed a slideshow, and keep it updated with the latest version.
#Step 1: Connect Your Webflow Account and Install the App
-
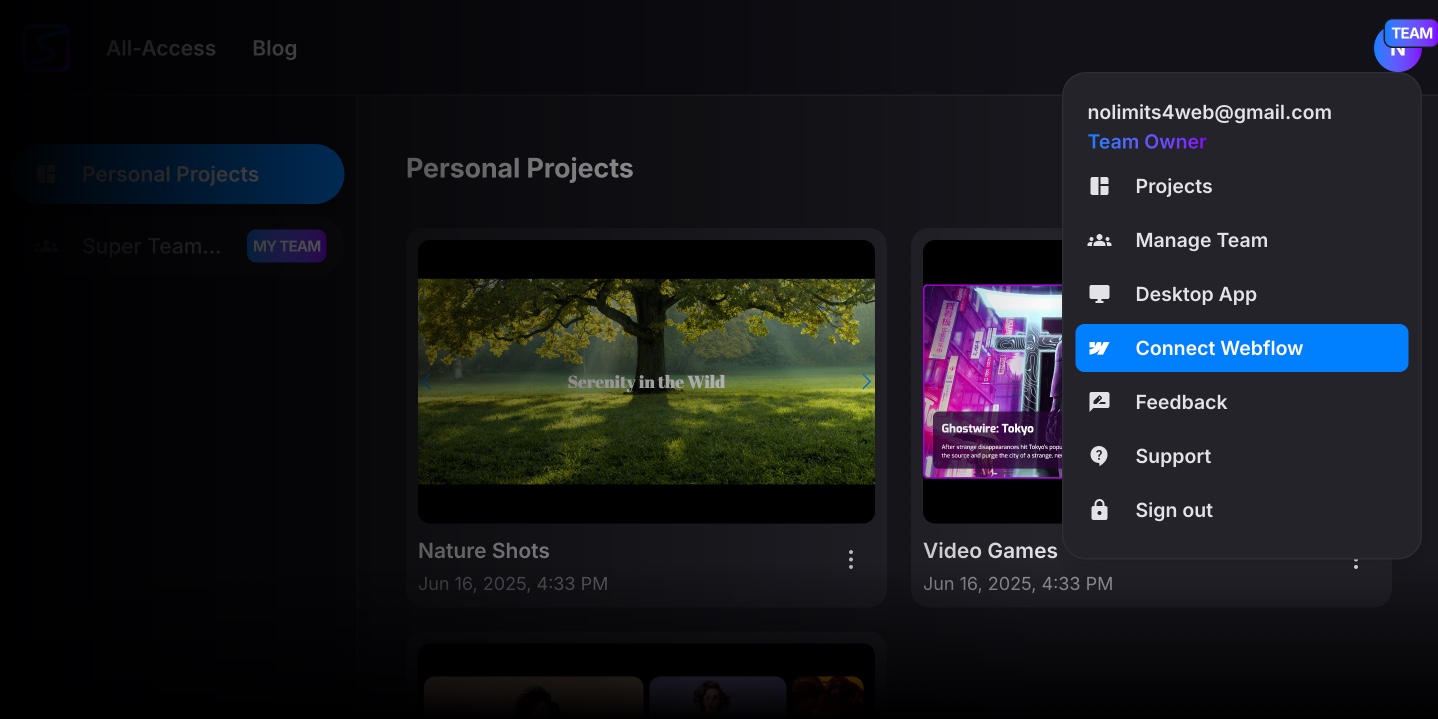
Log into your Swiper Studio account.
-
Go to the User dropdown menu and click the "Connect Webflow" button.
-
Follow the prompts to connect your Webflow account.
-
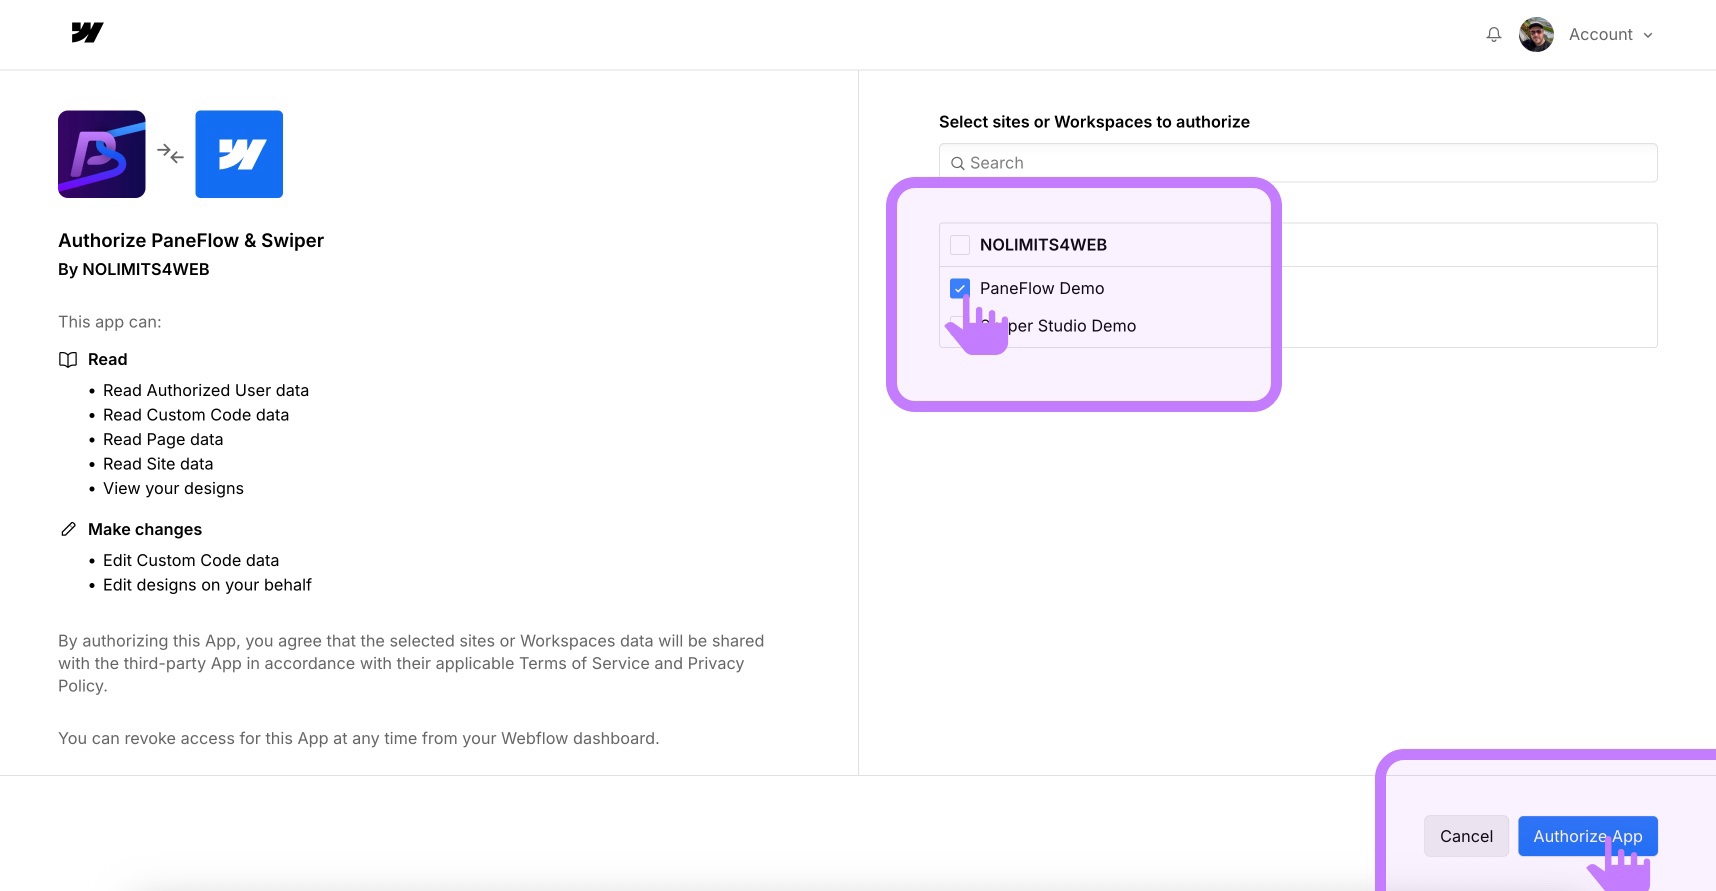
Install the PaneFlow & Swiper Studio app on the Webflow sites where you want to embed slideshows.
#Step 2: Publish Your Slideshow to Swiper Studio's CDN
Before embedding, you need to publish your slideshow project to Swiper Studio's CDN. If you're unfamiliar with this process, check out our detailed guide on How to Publish to CDN. Here's a quick overview:
-
Open your slideshow project in Swiper Studio.
-
Click the "Publish to CDN" button.
-
Your project is now ready to be embedded into Webflow and you will see same instructions as below in the "Webflow" tab.
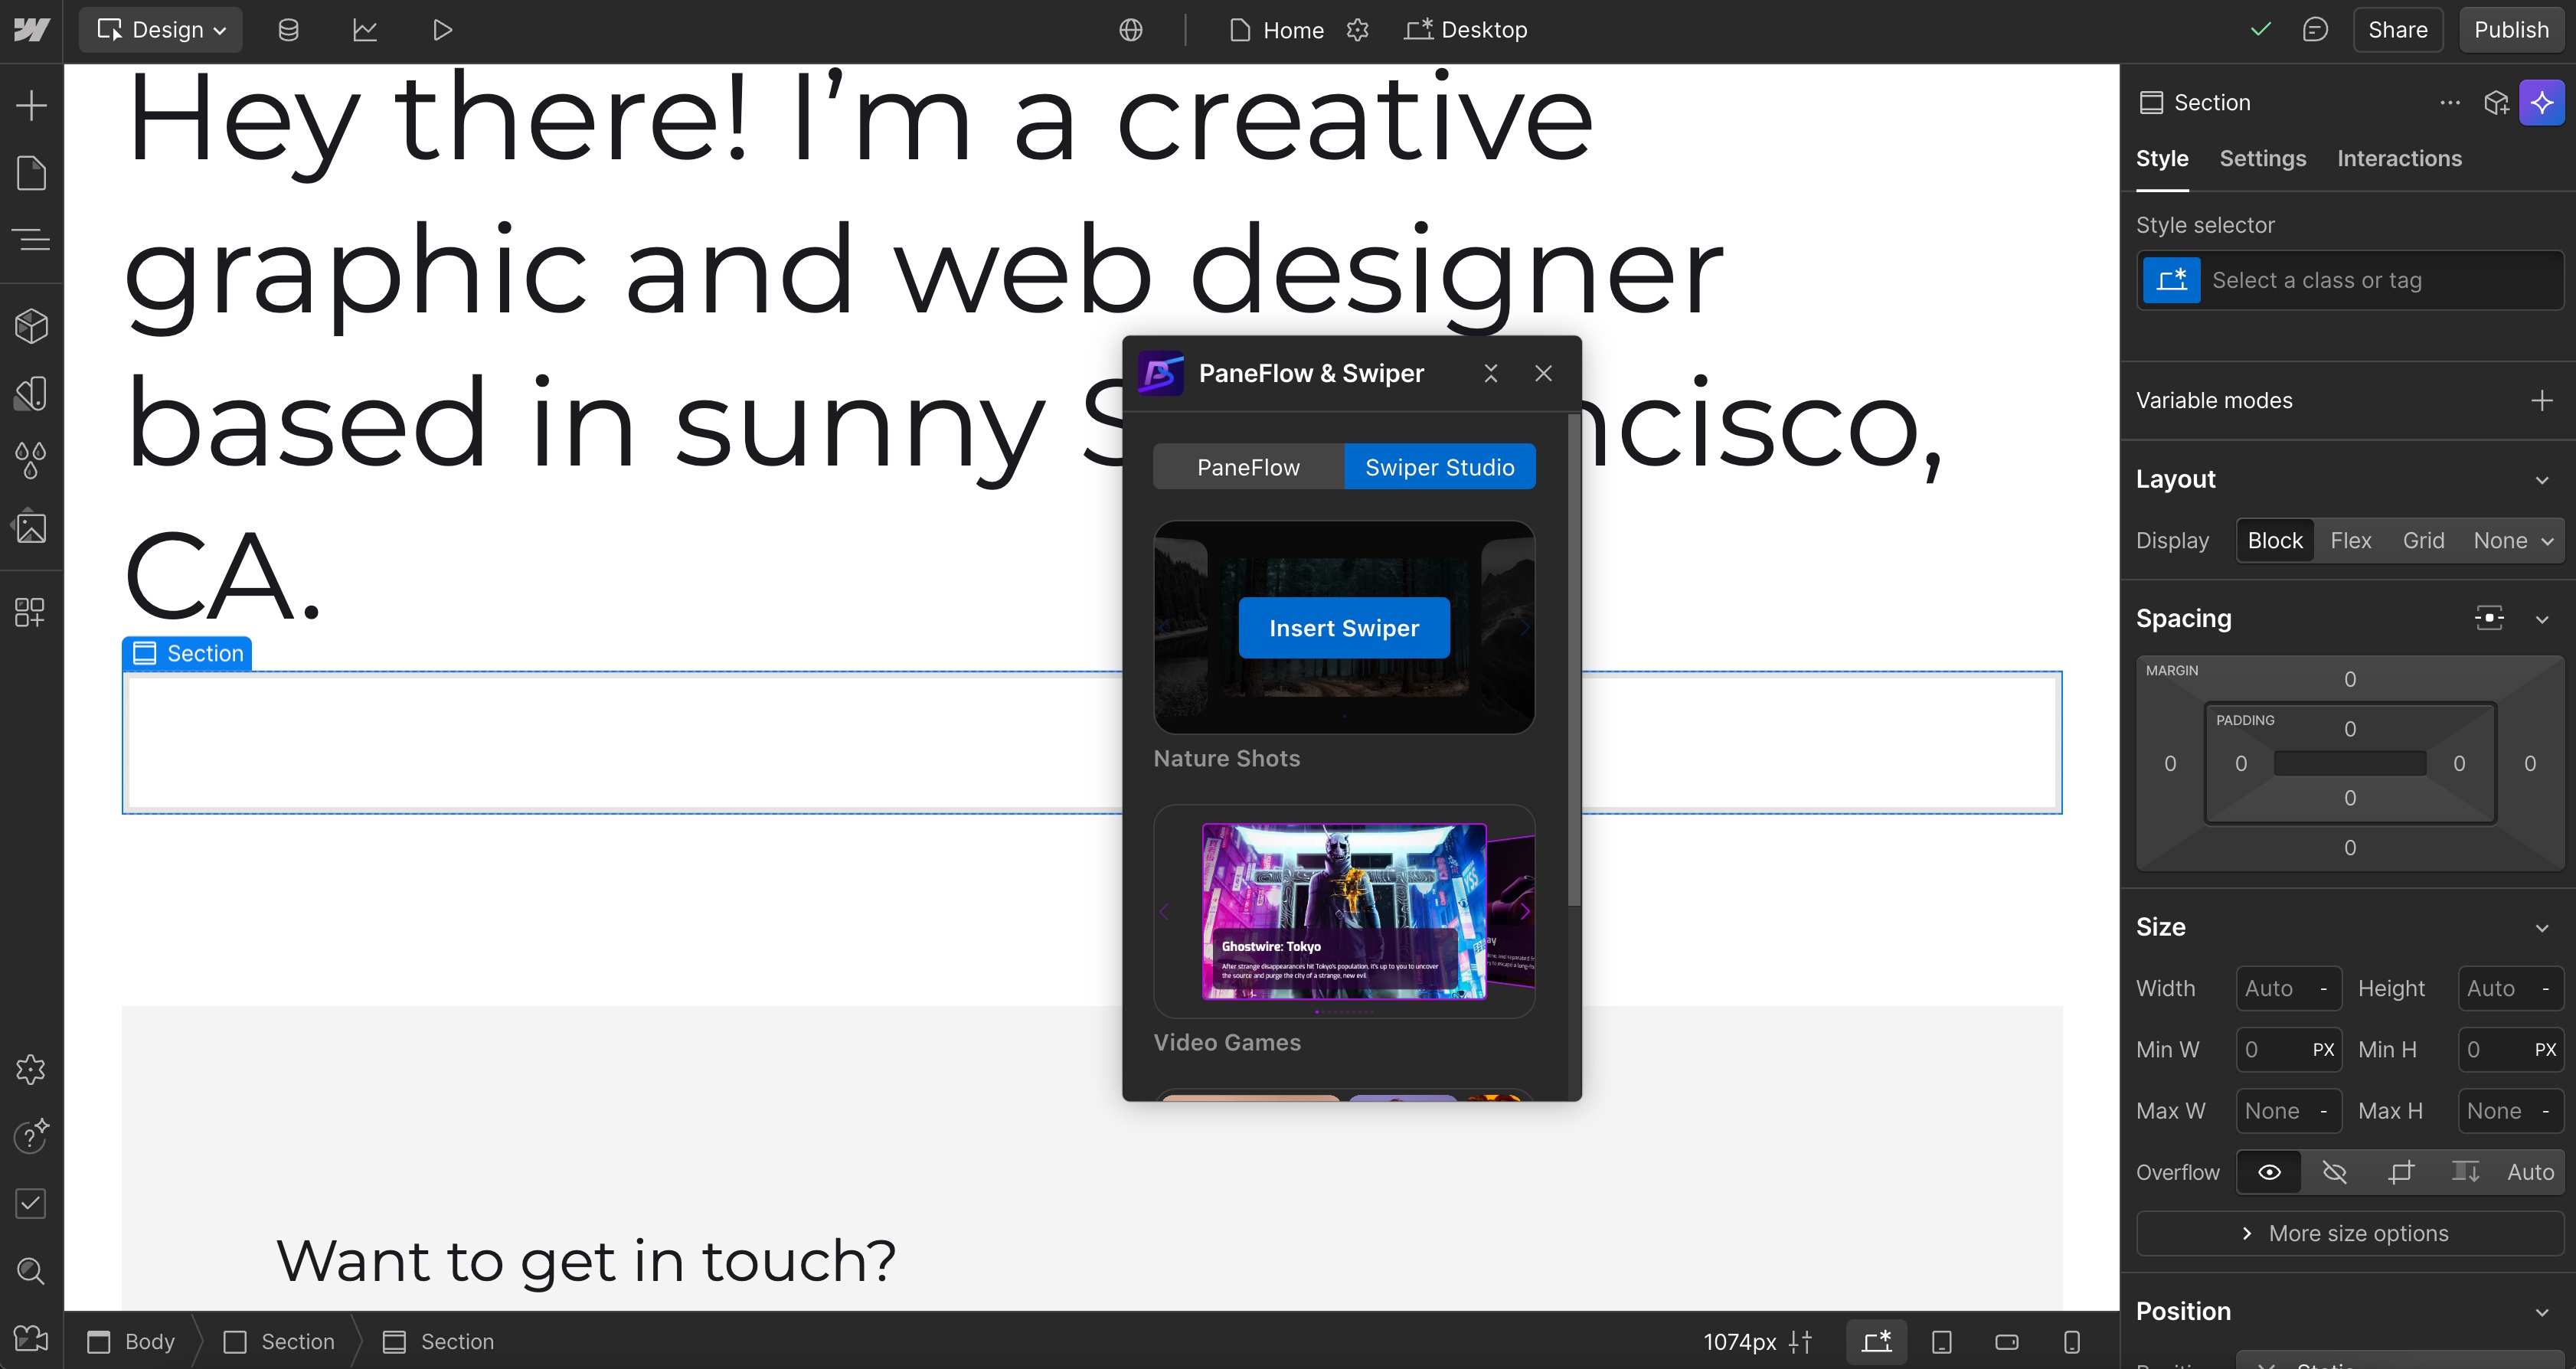
#Step 3: Embed Your Slideshow in Webflow
-
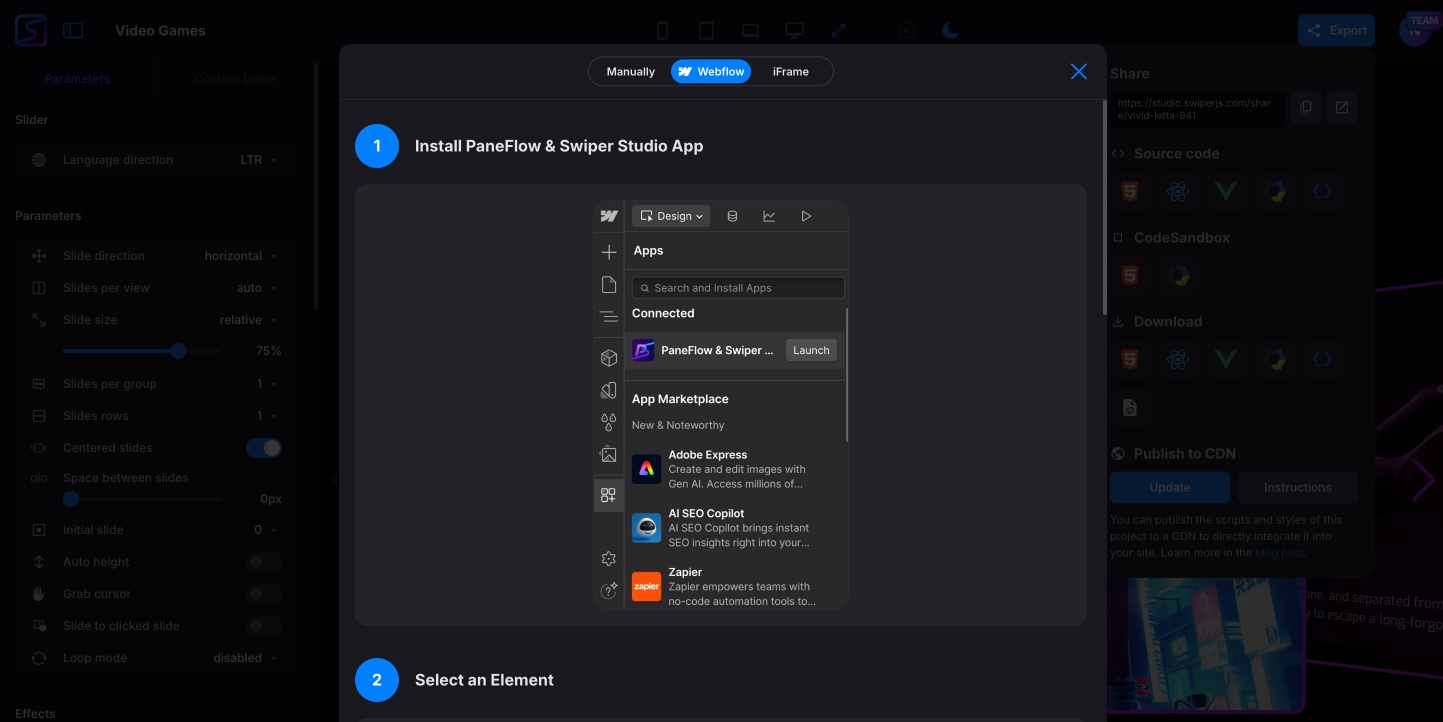
Open the Webflow Designer for your site.
-
Launch the PaneFlow & Swiper Studio app from within the Webflow Designer.
-
A modal window will appear, displaying all your Swiper Studio projects that have been published to the CDN.
-
Select the slideshow you want to embed and click the "Insert Swiper" button.
-
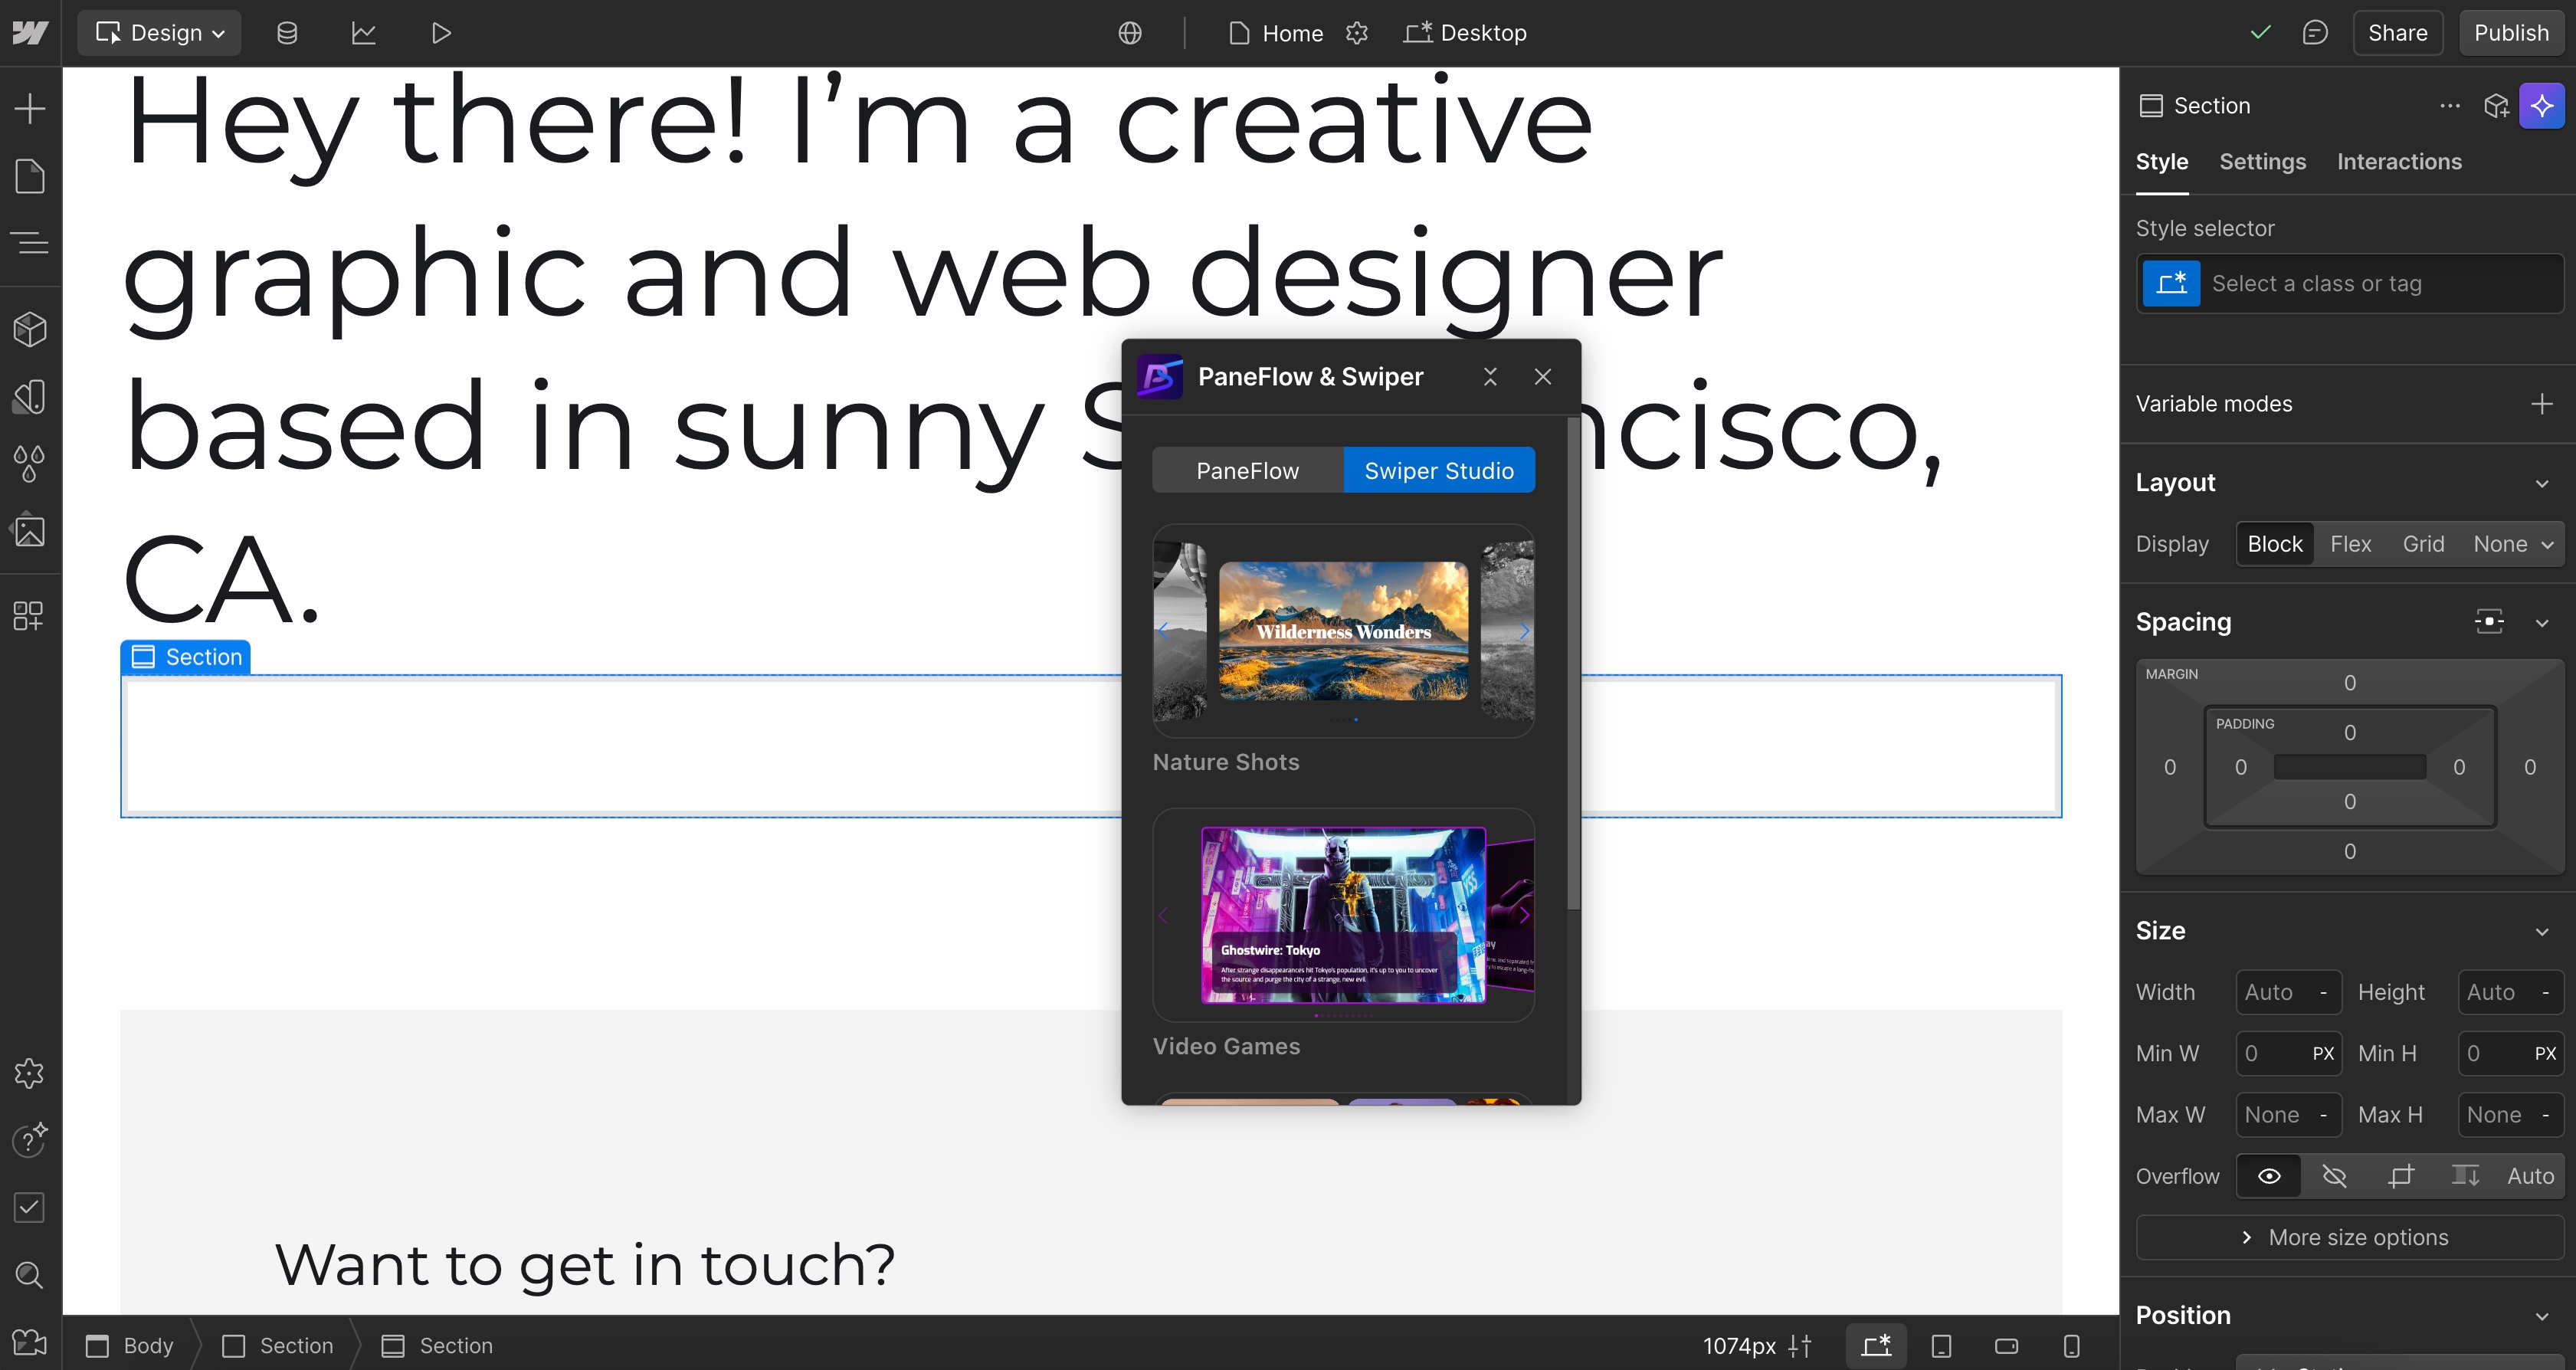
The currently selected element in the Webflow Designer will be replaced with your Swiper Studio slideshow.
Important Note: Once inserted, the slideshow won't be fully visible in the Webflow Designer. To preview it, click "Preview" in the Designer and enable "Custom Code" to see your slideshow in action.
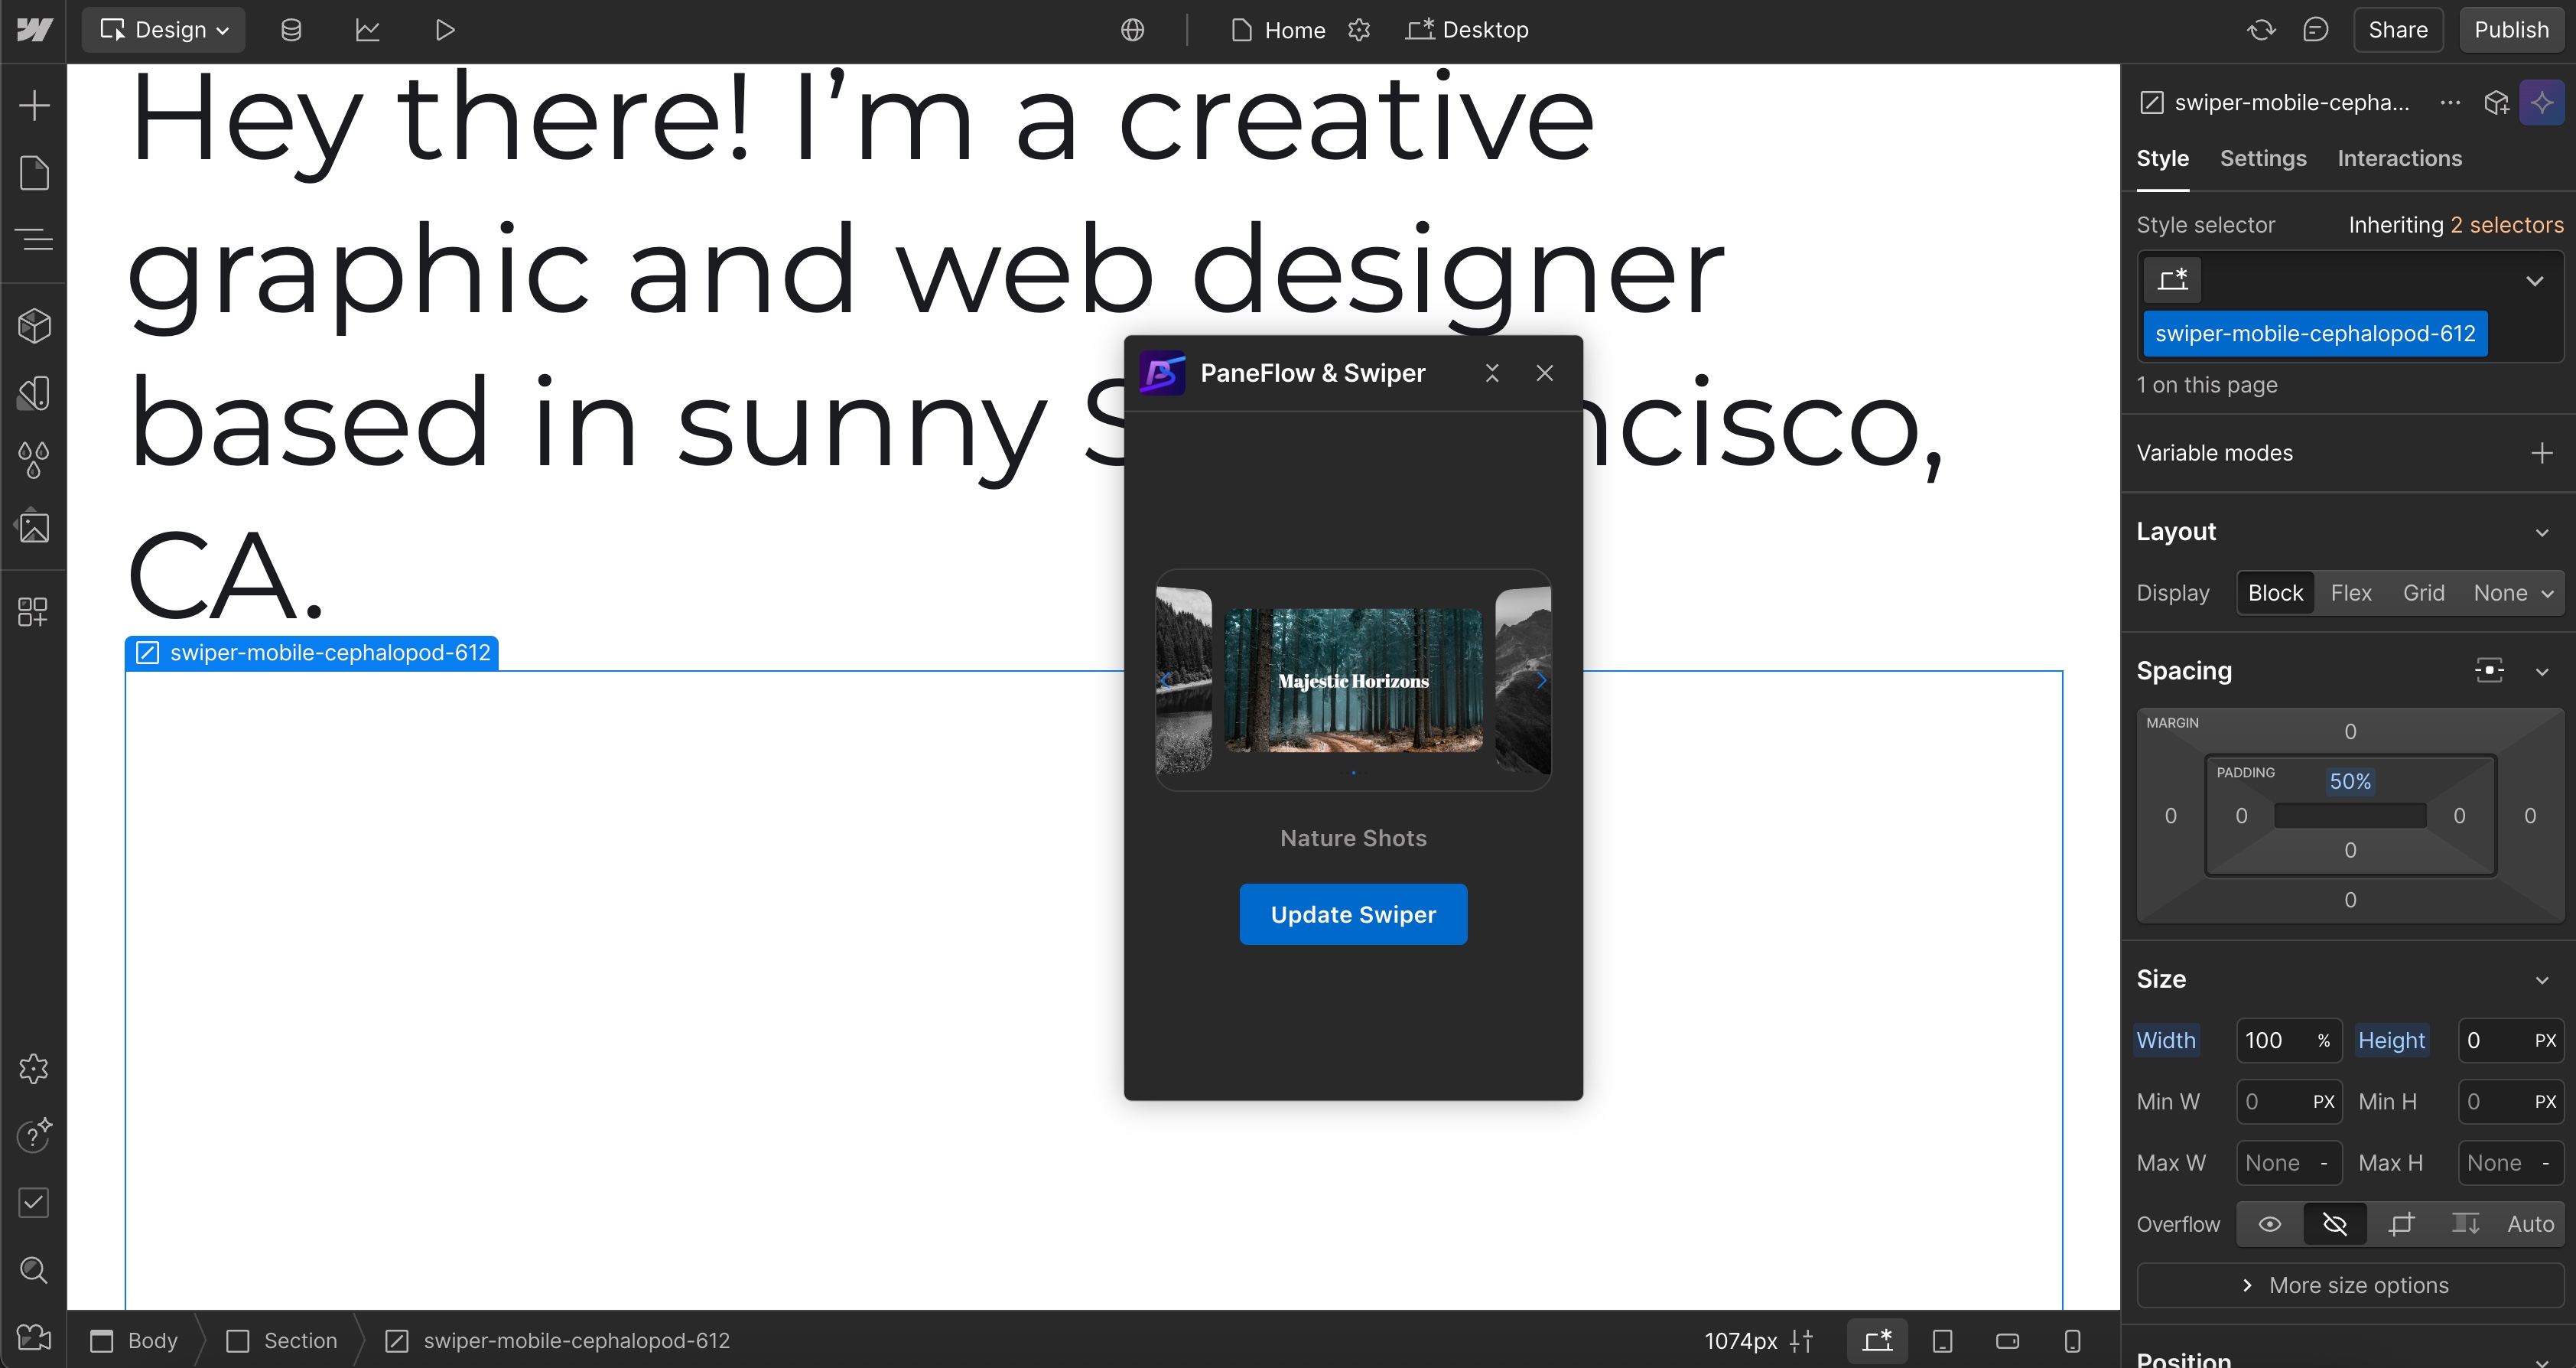
#Step 4: Update Your Slideshow with the Latest Version
Made changes to your slideshow and want to update it on your Webflow site? Here's how:
-
Open the Webflow Designer and launch the PaneFlow & Swiper Studio app.
-
Select the existing Swiper Studio slideshow in the Webflow Designer.
-
The PaneFlow & Swiper Studio app will detect the selected slideshow and display an "Update Swiper" button.
-
Click "Update Swiper" to automatically republish the slideshow on Swiper Studio's CDN and replace it with the latest version in the Webflow Designer.
With these simple steps, you can seamlessly integrate and update stunning slideshows on your Webflow sites, ensuring your projects always look their best.
#Key Benefits of the Swiper Studio + Webflow Integration
-
No-Code Workflow: Build and embed sliders without touching JavaScript or CSS, making it accessible for designers and non-coders.
-
Unmatched Customization: Access Swiper Studio's vast library of parameters to create sliders that align perfectly with your brand.
-
Responsive by Design: Sliders adapt seamlessly to mobile, tablet, and desktop viewports.
-
Performance Optimized: Swiper Studio's lightweight code ensures fast load times without sacrificing functionality.
#Real-World Use Cases
-
E-commerce: Showcase products with sleek, interactive sliders that highlight images, descriptions, and calls-to-action.
-
Portfolios: Create visually stunning galleries to display creative work with smooth transitions and effects.
-
Hero Sections: Build engaging hero sliders with parallax or 3D effects to captivate visitors right away.
-
Testimonials: Present customer reviews in a draggable slider
#Try It Today
Ready to transform your Webflow sites with Swiper Studio? Head to Swiper Studio to start building your slider, and follow our integration guide for detailed instructions. With a lifetime access plan to unlimited projects, there's no better time to enhance your Webflow designs.
Join the thousands of designers and developers already using Swiper Studio to create next-level sliders. We can't wait to see what you build!